Saturday, August 3, 2013

Challenging Myself

I absolutely love stamping, I go through withdraw if I don't stamp at least once a week.  When I first started stamping I would create my own cards more often than not, but over the last 2 years I have stopped creating and instead have been "CASEing."  Not that there is anything wrong with that (as long as you give credit where credit is due), but I just feel like I'm getting lazy.  So, the best way for me to step out of what has become my comfort zone I have been scoping out the many challenge blogs out there and really pushing myself to create some of my own cards.

Which brings us to today's post, a color challenge from Pals Paper Arts, and I must say I am rather excited about the card I developed.

Here is the challenge...


Strawberry Slush is a new Stampin' Up! In Color for 2013-2015, and it has become an absolutely favorite color of mine.

For my card I used a new technique that I have just recently started seeing, it's called Magical Masking Tape, and it is unbelievably easy to do.  Here is a link to the tutorial on Splitcoast Stampers.  


I'd love to hear what you think.

Products Used (All Products are Stampin' Up!)
Stamp Sets: Kind and Caring Thoughts (retired hostess set), and Petite Pairs
Cardstock: Strawberry Slush, Daffodil Delight, Smoky Slate, Basic Black and Whisper White
Ink: Strawberry Slush, Daffodil Delight, Smoky Slate and Versamark
Embellishments: Neutrals Candy Dots (Love These!), Basic Black Stampin' Emboss Powder
Tools: SNAIL, Heating Tool, Painter's Tape, Embossing Buddy

Tips
  1. Always use an embossing buddy when embossing, it really works well.
  2. The tutorial uses masking tape, I used blue painters tape instead.
  3. The candy dots can be used with the Candy Dot Brad Bases, or just adhered directly to the paper, like I did here.

If you try this technique let me know, I would love to know how you liked it.
Until next time.

Sunday, July 28, 2013

Well, It's About Time

Hi All!
Boy it sure has been a long time since I posted last...actually long time is an understatement, it's been 2 years!  Well, I recently went to the Stampin' Up! Convention celebrating their 25th year, and I'm feeling inspired to get back into blogging.

What better way to get back into the groove then with a challenge?  The challenge I'm participating in this week is from the Fab Friday Challenge Blog.  This blog has a new challenge every other Friday, and this Friday is a sketch challenge.


When I seen this sketch I knew the perfect technique to use.  It's called "Out of the Box" and I saw a video on how to make it on Dawn's Stamping Thoughts, it's pretty cool so be sure to check out her video.

Anyway, here is my card


Isn't it cool?  The flower on the whisper white layer in the upper right corner of the card is actually attached to the layer.  I stamped the flower in Coastal Cabana, laid the Deco Label Framelit over it and drew an outline of the framelit around the flower, and then cut out the part of the flower that was sticking out past the Framelit.  If that isn't clear (I'm sure it isn't) then rather then me recreating the wheel why don't you check out the video on Dawn's Stamping Thoughts.

So, I hope you like it.

Materials Used
Cardstock:  Whisper White, Baked Brown Sugar, Crisp Cantaloupe and Coastal Cabana
Ink:  Coastal Cabana, Crisp Cantaloupe and Black Staz On
Stamp Sets:  Flower Shop and Express Yourself
Punches:  Pansy Punch and 1/2" Circle Punch
Embellishments:  Vintage Faceted Designer Buttons
Tools:  Deco Labels Framelits, Beautifully Baroque Embossing Folder, Paper Piercing Tool, Stampin' Pierce Mat, Essentials Paper-Piercing Pack, SNAIL, Dimensionals

Til Next Time
Tammy :-)

Sunday, August 14, 2011

Vintage Vogue

I see I'm slacking again, it's been more than a week since I posted anything, tch tch tch Tammy, LOL.  This card is a pretty basic one, but fun to make.  I love the Vintage Vogue stamp set, the flowers are just so much fun.


Stamping Supplies
Card Stock:  Poppy Parade, Pretty in Pink, Very Vanilla
Classic Ink:  Poppy Parade, Pretty in Pink, Always Artichoke
Stamp Sets:  Vintage Vogue, Teeny Tiny Wishes
Punches:  Modern Label Punch, Word Window Punch
Accessories:  SNAIL, Paper Snips, Basic Pearls, Fire Circle Rhinestone Brads, Basic Rhinestones, Glue Dots

Tips
  1. Honestly I don't have any tips for this one, except maybe I used a glue dot on the flowers with the Rhinestone Brads, SNAIL will never hold that in place.
Bye for now, and stay dry!

Friday, August 5, 2011

Aviary

Good morning all, and it is a good morning because it is Friday and that means the weekend is here!  Today's card is CASE'd from one of my most favourite Stampin' Up! demonstrators...not that I know her personally, but I know her work well.  It is Kimberly Van Diepen and her blog is Stampin' By The Sea!


I've made a few changes, actually they aren't really changes, just "omissions" but essentially it is an out right copy of Kimberly's work!

Supplies
Stamp Sets:  Aviary, Teeny Tiny Wishes
Ink:  Black Staz On, Real Red Classic Ink
Card Stock:  Basic Black, Very Vanilla
Designer Series Paper:  Love Notes (retired)
Punches:  Modern Label Punch
Accessories:  SNAIL, Stamp-a-ma-Jig, 5/8" Basic Black Satin Ribbon, Sticky Strip, Paper Snips, Stamping Sponges


Tips
  1. The Modern Label punch comes in 1 size, so to layer it I cut the black outer layer in half and then just layer the ends.
  2. Sponging the edge of the Very Vanilla cardstock gives some depth to the images.
  3. I used the Stamp-a-ma-Jig to place the bird and the stand images perfectly.
  4. I used the sticky strip for the ribbon, which is just glued to the DSP and not wrapped all the way around.
Thanks for your visit today and if you get a chance check out Kimberly's blog, she has some great projects.

Tuesday, August 2, 2011

Good morning everyone.  I have had some requests recently for wedding cards, and since I have absolutely no mojo these days I scoped Stampin' Connection (a website for Stampin' Up! demonstrators) for a card to CASE, and found a gorgeous one that is made with my favourite stamp set, Heartfelt Thanks.  The woman I CASE'd it from is named Tracy, and besides being from Windsor, Ontario, that is all I know about her...thank you Tracy for the inspiration.


Supplies
Stamp Sets:  Heartfelt Thanks (retired), Occasional Quotes
Card Stock:  Basic Black, Brushed Silver, Whisper White
Ink:  Versamark
Accessories:  Embossing Buddy, Powder Pals, Silver Embossing Powder, 5/8" Basic Grey Satin Ribbon, SNAIL Heat Tool

Tips
  1. Your embossing buddy is really important when embossing with any kind of colored embossing powder.
  2. I tied a knot in the center of the ribbon and then taped it to the back of the card stock.  It helps save on ribbon.
That's all for now.  My posts have been pretty short lately, but at least I'm getting something posted!


Sunday, July 31, 2011

Masculine Cards

Happy Sunday everyone, I hope you are enjoying your day.  Today's card is a masculine one, I have such a hard time with these so when I saw this one in the catalog I couldn't resist.  I've already made about 8 of these LOL.


The greeting I used on mine is Happy Birthday, but it is such a versatile card you could use any greeting you wanted.

Supplies

Stamp Sets:  Lovely as a Tree, Something to Celebrate
Card Stock:  Soft Suede, River Rock, Baja Breeze, Cajun Craze, Crumb Cake, Textured Early Espresso
Classic Ink:  Early Espresso
Craft Ink:  Early Espresso
Stampin' Write Markers: Early Espresso
Accessories:  Gold Brads, Regal Brads, Neutral Brads, Subtles Brads, Paper Piercer, Mat Pack, Spritzer, Heat Tool, Clear Embossing Powder, SNAIL, Glue Dots, Embossing Buddy, Powder Pals

Tips
  1. This isn't really a tip, just a thought; don't you love how Stampin' Up! has so many different supplies to meet your needs.  I used a Stmapin' Write Marker, Craft Ink, Classic Ink and Textured Paper all in the same color; what more could you want out of a company!
  2. I embossed the tree with Clear Embossing Powder.  Craft Ink is an awesome way to be able to emboss in every one of SU!'s colors (except the in-colors ;-{).  All you need is Craft Ink in any color and Clear Embossing Powder and voila! 
  3. When emobssing you always want to use your Embossing Buddy so that the embossing powder only sticks on the ink, and not the paper.
  4. Once I stamped and embossed the tree I tore the paper around it free hand.
Well, that's all for today.  Bye for now.


Saturday, July 30, 2011

Love and Care

I can't tell you how much I absolutely love the hostess stamp set Love and Care in the summer mini...it's right up there with Watercolor Trio.  There is so much you can do with this set, and believe me I've done a lot already!


See what I mean, isn't this gorgeous!

Supplies
Stamp Set:  Love and Care
Card Stock:  Crumb Cake, Cherry Cobbler, Very Vanilla
Designer Series Paper:  Newsprint (Retired), Love Letter (Retired)
Classic Ink:  Basic Black, Crumb Cake
Stampin' Write Markers:  Cherry Cobbler, Old Olive
Accessories:  SNAIL, Stamping Sponges, 5/8" Black Satin Ribbon


Tips
  1. When I put the layers of this type of card together I use my grid paper to line it up, measure out the right size and attach the pieces before gluing it to the card base.
  2. I cut all of my Stamping Sponges into 4 pieces each and have a sponge for every color...yeah I know (LOL)!
  3. When sponging the edges of my card stock I rub the sponge on the ink pad and then rub off on a scrap piece of paper before applying it to the card stock, this way it is more subtle.
I CASE'd this card from one I found on Stampin' Connection and I apologize I don't know who made the original.  If you know who did please let me know and I will give them credit.
Thanks for stopping by.

Tuesday, July 26, 2011

Fabulous Florets

Sometimes the best things come in simple packages, and this card is a perfect example of that.  I CASE'd this card from what is obviously a talented demonstrator, but unfortunately I don't know who that is...if you do please let me know so that I can give them credit.


Supplies
Stamp Sets: 
Fabulous Florets, Petite Pairs
Card Stock:  Confetti Cream, Early Expresso
Craft Ink:  Cherry Cobbler Craft Ink (great for heat embossing)
Punches:  Large Oval Punch, Scallop Oval Punch
Accessories:  Cherry Cobbler Embossing Powder, Embossing Buddy, Heat Tool, Powder Pals, Gold Glow Smooch Spritz, Color Catcher, Dimensionals

Tips
  1. Whenever you are heat embossing the Embossing Buddy is a must, it helps keep your embossing powder stick only where it is supposed to.
  2. When heat embossing you can used Versamark or Craft Ink, I used the Craft Ink.  Both of these inks take a little bit to dry so the embossing powder sticks to it.  Classic ink dries to quickly and the embossing powder won't stick.
  3. The Heat Tool gets very very very hot, so be careful!
  4. When using the Smooch Spritz you need to do it in an encolsed space so you won't get the Spritz all over every thing; I used the Color Catcher.
  5. The closer the spritz bottle is to the card the more concentrated the Spritz will be, the farther away the more spread out.
  6. When using the Smooch Spritz you may need to clean the nozzle before spraying because it can get clogged up, and be sure to shake the bottle well.

That's all for today, and please STAY COOL today.

Sunday, July 24, 2011

Triple Treat

The first stamp in the new catalog that I knew I just HAD TO HAVE is called Triple Treat Flower.  It is just an a la carte stamp, not a set just a single lone stamp.  This is what it looks like


So whats the big deal right?  Well it's one small single stamp that you can use 3 punches on and all of a sudden this stamp has so many possibilities.  I made 2 different yet similar cards to show you what I mean.


Supplies
Stamp Sets:  Triple Treat Flower, Petite Pairs
Card Stock:  Whisper White, Pool Party, Wisteria Wonder
Classic Ink:  Pool Party, Wisteria Wonder and Pretty in Pink
Punches:  Large Oval, Scallop Oval, Flower Fancy, 5-Petal Flower and 1/2" Circle
Accessories:  3/8" Wisteria Wonder Ruffled Ribbon (I LOVE this ribbon), Basic Pearls, Perfect Polka Dots Embossing Folder, Dimensionals, SNAIL

Tips:
  1. I used Pool Party Classic Ink to stamp the images on the Pool Party Card Stock making my own DSP
  2. To make the flower first I stamped it in Wisteria Wonder and punched it out with the Flower Fancy Punch, then I stamped it again in Pool Party and punched that out with the 5-Petal Flower Punch, and finally I stamped the flower one last time and punched the center out with the 1/2" circle punch.
  3. Once I was done with all of the stamping and punching I layered it using SNAIL and then placed it on the Pool Party Card Stock using Dimensionals and then I placed a Basic Pearl in the center of flower.

So now lets check out the second card I made.


Supplies
Stamp Sets:  Triple Treat Flower, Thanks for Caring
Card Stock: Whisper White
Designer Series Paper:  Flirtatious Speciality
Ink:  Wisteria Wonder, Pool Party, Pretty in P
Punches:  Moder Label, 1/2" Circle, Flower Fancy, 5-Petal Flower, Scallop Trim Border
Accessories:  3/8" Wisteria Wonder Ruffled Ribbon (did I mention I LOVE this ribbon), Dimensionals, SNAIL, Polka Dots Embossing Folder, Basic Pearls

Tips
  1. I stamped the Triple Treat Flower in Pool Party first, then Wisteria Wonder and Pretty in Pink.
  2. This card is essentially the same layout as the first one, I just switched the colors around a little and voila!
That's it for today, I hope you enjoyed my cards today.


Friday, July 8, 2011

Strength and Hope

This is a cad I made a long time ago, and it is a CASE, I'm just not sue who I cased it from.  I made this cad using the Strength and Hope stamp set, which is part of Stampin' Up's! Making a Difference Campaign; for every one of these stamp sets sold during the summer mini period (until August 31st, 2011) Stampin' Up! will donate $2.00 to The Breast Cancer Research Foundation.  It's a great set, I especially love the butterfly in it. 


Supplies
Cardstock:  Very Vanilla, Perfect Plum
Stamp Sets:  Strength and Hope, En Francais
Classic Ink:  Perfect Plum, Soft Suede
Accessories:  Cutter Kit, Stampin' Sponges, Perfect Polka Dots Textured Impressions Embossing Folder, 1/2" Chantilly Crochet Trim, SNAIL, Paper Snips

Tips
  1. This is the vintage look, so there is lots of tearing, and sponging going on.
  2. The butterflies are cut out using my Paper Snips.
  3. Don't you just love the purple gems on the butterfly, that was done with my I-Rock, a Christmas gift from my oh so sweet nephes.
I hope you enjoy today's post, and be sure to check back soon because I have a very large order of all brand new product that will be delivered today and will be digging in and start creating as soon as the UPS man drops it off.

Bye for now.

Thursday, June 9, 2011

Another Catalog Case

I have been so busy at work lately that I just have no mojo for designing cards...none!  I'm still loving spending time in my craft room, but in order to get anything accomplished in there is have to rely on CASEing, thank god there is tons of ideas and projects out there for me to use.  Today's card is another CASE from our new 2011-2012 Idea Book and Catalog (only 21 days!).  I didn't have the stamp sets used in this card so I improvised some.


Supplies
Cardstock:  Textured Rose Red, Old Olive, Rich Razzleberry, Whisper White
Classic Ink:  Rose Red, Old Olive, Rich Razzleberry
Stamp Sets:  So Happy For You (Sale-a-Bration 2011), A Slice of Life
Punches:  1/2" Small Circle
Accessories:  5/8" Rich Razzleberry Satin Ribbon, SNAIL, Dimensionals

Hints and Tips
  1. I used a ruler to help line up the heart stamp and the butterfly stamp.
  2. I stamped the flower and clover images and punched them out with the 1/2" circle punch.
  3. Dimensionals were used to raise flower and clover images.
  4. The Old Olive and Rich Razzlebery

Bye for today!


Tuesday, June 7, 2011

Funky Four

Today's post is a short one, but the card is a cute one.


Supplies
Card Stock:  Always Artichoke, Night of Navy, Pretty in Pink, Whisper White
Classic Ink:  Always Artichoke, Night of Navy, Pretty in Pink
Stamp Set:  Funky Four
Accessories:  Pretty in Pink 1-1/4" Striped Grosgrain Ribbon, Elegant Lines Textured Impressions Embossing Folder, Regals Designer Buttons, Hemp Twine, SNAIL

The bling is non-SU, but deserves to be mentioned here because it was a Christmas gift from my nephew DJ.

Sunday, June 5, 2011

Stamping 411 Saturday Sketch Challenge

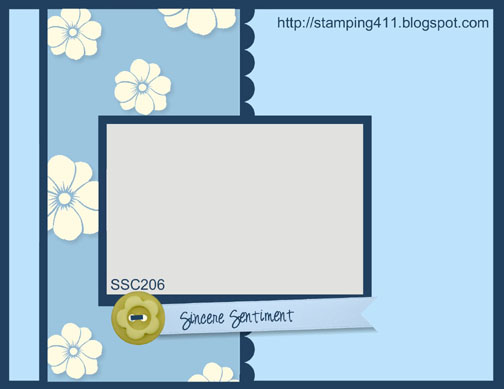
It's been a long time since I participated in a challenge of any sort...so today I decided it was long overdue.  My card today is for the Saturday Sketch Challenge for Stamping 411.  Here's the sketch...


This is a great sketch, and I love that the Operators of Stamping 411 include the measurements with their sketch, it's so much easier then me trying to figure it out through trial and error.


Supplies
Card Stock:  Wisteria Wonder, Pretty in Pink
Designer Series Paper:  Flirtatious
Classic Ink:  Wisteria Wonder, Pretty in Pink, Cherry Cobbler
Stamp Sets:  Delicate Doiles, Something to Celebrate
Punches:  1 1/4" Square Punch, Scallop Trim Border Punch
Accessories:  Perfect Polka Dots Textured Impressions Embossing Folders, SNAIL, Brights Designer Buttons, Whisper White Bakers Twine, Glue Dots

Tips
  1. I used the 1 1/4" punch to cut the angles on both ends of the greeting.
  2. On each end of the greeting I use a glue dot so that I could make the center of the greeting stand up.
This is definitely my last post for today, but I'll see you later this week.

I'm Back with More New Products

I'm loving my new Stampin' Up! supplies, it's so much fun to play and create with new stuff! Today's card is a sort of CASE from the new catalog (just 25 days to go!) and it's using some new products and old ones too.


Supplies:
Cardstock:  Crumb Cake, Chocolate Chip and So Saffron
Classic Ink:  Chocolate Chip, Tangerine Tango
Stampin' Write Markers:  Chocolate Chip, Tangerine Tango
Stamps:  Simply Soft, Watercolor Trio
Punches:  Scallop Trim Border, Scallop Oval, Large Oval
Accessories:  Chocolate Chip 1/2" Scallop Dots Ribbon (wait til you see all the colors this comes in!), SNAIL, Vintage Wallpaper Textured Impressions Embossing Folder, Color Spritzer Tool, Stampin' Dimensionals

Tips and Tricks
  1. The closer you have the Color Spritzer Tool to the paper the more concentrated the color spray will be on the paper.
  2. The So Saffron cardstock is 2" wide, the Chocolate Chip layer with the Scalloped Trim Border is ~ 2 5/8".
I hope you enjoy this card!
Bye for now,

Saturday, June 4, 2011

My Favourite Time of the Year

It's not Christmas.
It's not my birthday (I've had enough of those, I don't need anymore).
I'm not retiring (guess I do need a few more birthdays if I'm ever going to reach that point).
I'm not going on vacation.
So what the heck is it you ask.

It's new catalog time, yep SU!'s 2011-2012 catalog comes out on July 1st.  That means new stamps, new toys, and 5 new in-colors.  Since I'm a demonstrator I got to order some sneak peak products and with that order came the new catalog...and I gotta say I'm liking it, ALOT!

With the new catalog comes the last chance list; SU! needs to make room for the new products so unfortunately every year some stamps and products are retired.  I will be posting that list on the sidebar so be sure to check it out and if you see something you want you should order it quickly before it's sold out.

I can't show you the new products I ordered or the new catalog until July 1st, but I can show you some projects I made with the new products. 

So here's a card I made this morning with some of my new products.


Supplies
Cardstock:  Wisteria Wonder (my new favourite), Pool Party, Whisper White
Stamps:  Delicate Doilies
Designer Series Paper:  Flirtatious
Classic Ink:  Wisteria Wonder, Pool Party, Pretty in Pink
Punches:  Designer Label Punch, Modern Label Punch
Accessories:  SNAIL, Basic Pearls, 5/8" Satin Pretty in Pink Ribbon

Tips
  1. It's a pretty straight forward card, so just have fun with it!

I hope you like this card and I hope you are as excited about the new products as I am.  Be sure to come back soon to see what else I've made with my new products.


Saturday, April 23, 2011

Cricut Expression 2

Check it out everyone My Pink Stamper is giving away the brand new (hasn't even been released yet!) Cricut Expression 2.
If I won this I would donate my my Expression to my unit for patients and staff...the possibilities are endless!!!

Sunday, April 10, 2011

cQc#79

I have followed the colorQ blog for a long time, but I think this is the first time I've done a card for their challenges, no reason really.  But, but when I seen the inspiration for this challenge I knew it was time for me to play along with them and I knew immediately what I was going to do for it.  Here is the inspiration for colorQ challenge #79


Doesn't that look like a fun challenge to play?  Can you guess what technique I used for this challenge?  I did the Baby Wipe technique from http://www.splitcoaststampers.com/; you can follow the link to the tutorial for this.


Supplies
Card Stock:  Basic Black, Melon Mambo, Whisper White, Marina Mist (I don't have any Bermuda Bay)
Stamp Sets:  En Francais, Day of Gratitude, Something to Celebrate
Reinkers:  Melon Mambo, Marina Mist, Old Olive
Ink:  Basic Black
Punches:  Modern Label Punch
Accessories:  Old Olive 5/8" Satin Ribbon, SNAIL, baby wipes

Tips
  1. It is very messy, so I would put paper towels under your baby wipe before you put your reinkers on it.
Enjoy

Thursday, April 7, 2011

A La Card Monkey


Isn't this is an awesome bag of goodies...this is the prize that A La Card Monkey is giving away for their theme challenge this week.  Check out this list of things that are included in this prize...
Garden Whimsy 8pc stamp set


Goody-Goody Gumdrops 19pc set
Picnic Parade 15 pc set
Stampin Fun for Everyone 7pc set
Chocolate Chip grosgrain ribbon 5/8"
Fresh Favorites 1 Buttons
Baja Breeze Corduroy button brads
Chocolate Chip Library Clips 1/2"
Sweet Pea stitched felt flowers
Welcome Neighbor DSP pad
Baja Breeze 81/2 X 11 Card Stock
On board Blossoms chipboard

But, this is not all of the prizes for this week, check out their blog for what else is being offered at A La Card Monkey  And while you are there you can check out all of the cards entered in this weeks challenge...and maybe even enter one of your own.

Saturday, April 2, 2011

A La Card Monkey Nature Challenge

It has been a long time since I've done any challenges, and I think it's time for me to start getting those creative juices flowing again.  As a SU! demonstrator there is a website called Stampin' Connection that we can access.  While looking through that website last night I found a discussion about a new challenge blog, so I needed to check it out.  It's called A La Card Monkey, and they will be doing weekly challenges.  The theme for this week's challenge is nature:


It's just a simple card, but who says there is anything wrong with simple?  I don't have many nature sets...hmmm, maybe I better do some shopping. 

Supplies
Card Stock:  Not Quite Navy, Watercolor, Soft Suede
Designer Series Paper:  Paisly Petals
Stamp Sets:  Spring Song (retired)
Ink:  Not Quite Navy, Soft Suede, Baja Breeze, Basic Black Craft Ink
Punches:  2-3/8" Scallop Circle, 2-1/2" Circle, Decorative Label Punch, Dotted Scallop Ribbon Border Punch
Accessories:  Basic Black Embossing Powder, Heat Tool, Embossing Buddy, Powder Pals, Basic Pearls, Paper Snips, SNAIL, Dimensionals, Vanilla Shimmer Smooch Spritz, Color Catcher, Aqua Painter

Tips
  1. You can't see the effect of the Smooch Spritz in the picture, but it really adds some shimmer to the card.
  2. The color catcher is a great tool to have when using the Smooch Spritz.
  3. Never try to do watercoloring without paper towel close by.  I always seem to get too much water on the picture, and dabbing the area with paper towel always does the trick.
  4. I used watercolor paper so I could do watercoloring on the bird, so I also used watercolor paper for the greeting; just so it would have the same look as the bird. 

Products
I just learned (I know, the whole world has known how to do this forever...) how to do screen shots, so now I can show you some of the SU! products I used. 

The Pearlized Smooch Spritz is a spray that adds some shimmer to your cards.


And the Color Catcher is just a box that you can leave set up to catch the spray so you don't get anything on the furniture.


These things are all in the 2010-2011 Idea Book and Catalog, but the Designer Series Paper isn't.  SU! has given us a little sneak peek of the 2011-2012 Idea Book and Catalog.

Doesn't that look fun!!

Anyway, on my last post I told you I would show you how to layer the Decorative Label Punch.  This is not something I came up with, I seen it done on a video on The North Shore Stamper.

To start you want to punch out 2 of the Decorative Label shapes in whatever color you are going to use for the layering.


With your Paper Snips cut each one of the shapes in half, one lengthwise and the other shortwise (is that a word?).


Then you want to cut the corner tips of each one.  The cuts don't need to be straight because you won't see it, you just don't want those points showing in the layers.


With the tips cut off use SNAIL to put the first layer on, it doesn't matter which one you do first, just be sure to either do the top and bottom, or 2 sides; not a top and a side. 


Honestly you could stop here if you wanted, just the top and bottom layer looks good.


After the top and bottom, use your SNAIL to add the 2 sides, so the back looks like this.

And the final product looks like this.


As always, let me know if you have any questions, and I hope you enjoyed my post today.